ORACLE Database 11g Release 2 Installation Steps on Redhat Enterprise Linux 5

Step 1. Login from Root user on RedHat Linux System
Step 2. To create the oracle account and groups, execute the following commands on the terminal:
# groupadd dba # group of users to be granted SYSDBA system privilege
# groupadd oinstall # group owner of Oracle files
# useradd -g oinstall -G dba oracle
# passwd oracle

Step 3. Setting System parameters
i. Edit the /etc/sysctl.conf and add following lines:
kernel.shmall = 4294967295
kernel.shmmax = 268435456
kernel.shmmni = 4096
kernel.sem = 250 32000 100 128
fs.file-max = 6553600
net.ipv4.ip_local_port_range = 1024 65000
net.core.rmem_default = 4194304
net.core.rmem_max = 4194304
net.core.wmem_default = 262144
net.core.wmem_max = 262144


You need reboot system or execute "sysctl -p" command to apply above settings

ii. Edit the /etc/pam.d/login file and add following line:
session required pam_limits.so

iii. Edit the /etc/security/limits.conf file and add following lines:
oracle soft nproc 2047
oracle hard nproc 16384
oracle soft nofile 1024
oracle hard nofile 65536

Step 4. Creating oracle directories
# mkdir /opt/oracle
# mkdir /opt/oracle/OraDB11gR2
# chown -R oracle:oinstall /opt/oracle/
# chmod 775 /opt/oracle/ -R

Step 5. Setting Oracle Enviroment
Edit the /home/oracle/.bash_profile file and add following lines:
ORACLE_BASE=/opt/oracle
ORACLE_HOME=$ORACLE_BASE/OraDB11gR2
ORACLE_SID=ORCL
ORACLE_OWNER=oracle
LD_LIBRARY_PATH=$ORACLE_HOME/lib
PATH=$PATH:$ORACLE_HOME/bin
export ORACLE_BASE ORACLE_HOME ORACLE_SID LD_LIBRARY_PATH PATH ORACLE_OWNER
Save the .bash_profile and execute following commands for load new enviroment:
cd /home/oracle
. .bash_profile


Step 6. Download and install required .rpm packages
Some additional packages are required for succesful instalation of Oracle software. To check wheter required packages are installed on your operating system use following command:
# rpm -q binutils elfutils elfutils-libelf gcc gcc-c++ glibc glibc-common glibc-devel compat-libstdc++-33 cpp make compat-db sysstat libaio libaio-devel unixODBC unixODBC-devel|sort

Step 7. Copy Oracle Database 11g Release 2 software into /mnt directory.
Extract the files using following command:
unzip linux_11gR2_database_1of2.zip
Step 8. Change the Ownership and Group of database folder
# chown oracle /mnt/database –R
# chgrp oinstall /mnt/database –R

Step 9. Login from oracle user on RedHat Linux

Step 10. Start the Oracle software installation process.
Now the system is prepared for Oracle software installation. To start the installation process execute the following commands:
cd /mnt/database
./runInstaller
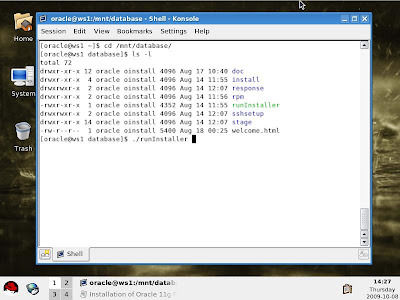
Oracle Universal Installer will walk you through with self explanatory instructions. Here are screen-shots from simple Oracle 11g R2 Installation:

Provide your email address to be informed of security issues

Select installation options

Node Selection

Select Product Languages

Select Database Edition

Specify Installation Location

Create inventory

Privileged Operating System Groups

Perform prerequisite checks

Review Oracle Database 11g Installation summary and click install


At the end of the installation process a dialog box appear that shows two scripts must run as root user before you further proceed. These scripts are orainstRoot.sh and root.sh. Open new termianl and login as root user and run these scripts.


Installation completed successfully
Common Installation Errors
DISPLAY not set. Please set the DISPLAY and try again.
Solution: Execute "export DISPLAY=:0.0" when you perform installation on local machine or "export DISPLAY=:0.0 when you perform installation on remote machine connected over SSH". Don't forget to execute "xhost +" command on client machine.
Error while loading shared libraries: libaio.so.1: cannot open shared object file: No such file or directory
Solution: Install libaio and libaio-devel packages. If packages already installed and error still occurs try execute "ldconfig" as root.
Check complete. The overall result of this check is: Failed <<<<
Solution: Install missing package or set check system parameters (See reason of failure).


Comments
Post a Comment