Oracle Database 11gR2 Grid Infrastructure and Automatic Storage Management for a Standalone Server (Part-1)
I have successfully Installed Oracle 11gR2 Grid Infrastructure and Automatic Storage Management for a Standalone Server on Oracle Enterprise Linux 5.4. I mostly use SUSE Enterprise Linux because of YAST tool but Oracle ACFS/ADVM is not supported on SUSE Linux. Oracle Automatic Storage Management Cluster File System and Oracle Automatic Storage Management Dynamic Volume Manager (ACFS/ADVM) are supported only on Oracle Enterprise Linux 5 and Red Hat Enterprise Linux 5 for Linux x86 and Linux x86-64. Maybe ACFS/ADVM support on SUSE Linux patches or documents are available on Oracle Metalink. That’s way I chose OEL 5.4 for Grid Infrastructure Installation.

#mkdir -p /opt/grid


> command to create the ASM disk label for each disk.
In my casethe disks names are DISK1, DISK2 and DISK3 as shown in the screenshot.


Requirements for Oracle Grid Infrastructure Installation
1) Memory Requirement
At least 1 GB of RAM
2) Disk Space Requirement
At least 3 GB of disk space
At least 1 GB of disk space in the /tmp directory
3) Software Requirement
Linux_11gR2_grid
4) ASMLib Software Requirement
oracleasm-support-2.1.3-1.el5.i386.rpm
oracleasmlib-2.0.4-1.el5.i386.rpm
oracleasm-2.6.18-164.el5-2.0.5-1.el5.i686.rpm
These rpm packages are available on OEL 5.4 DVD.
5) Extra Disk Requirements
There are unformatted disk partitions are required to mark as ASM disks and form into an ASM diskgroup. In my case these drives are named /dev/sda, /dev/sdb and dev/sdc.
Step 1
Login from Root user
Step 2
Create the accounts and groups
#groupadd -g 501 oinstall
#groupadd -g 502 dba
#groupadd -g 503 oper
#groupadd -g 504 asmadmin
#groupadd -g 505 asmoper
#groupadd -g 506 asmdba
#useradd -g oinstall -G dba,asmdba,oper oracle
#useradd -g oinstall -G asmadmin,asmdba,asmoper,oper,dba grid
#groupadd -g 502 dba
#groupadd -g 503 oper
#groupadd -g 504 asmadmin
#groupadd -g 505 asmoper
#groupadd -g 506 asmdba
#useradd -g oinstall -G dba,asmdba,oper oracle
#useradd -g oinstall -G asmadmin,asmdba,asmoper,oper,dba grid

Step 3
Create directories in /opt directory
#mkdir -p /opt/oracle
Set Ownership, Group and mod of these directories
#chown -R grid:oinstall /opt/grid
#chown -R oracle:oinstall /opt/oracle
#chown -R oracle:oinstall /opt/oracle
#chmod -R 775 /opt/grid
#chmod -R 775 /opt/oracle
Step 4
Set password for grid and oracle users
#passwd grid
#passwd oracle
Step 5
Setting System Parameters
i) Edit the /etc/security/limits.conf file and add following lines:
grid soft nproc 2047
grid hard nproc 16384
grid soft nofile 1024
grid hard nofile 65536
oracle soft nproc 2047
oracle hard nproc 16384
oracle soft nofile 1024
oracle hard nofile 65536
grid hard nproc 16384
grid soft nofile 1024
grid hard nofile 65536
oracle soft nproc 2047
oracle hard nproc 16384
oracle soft nofile 1024
oracle hard nofile 65536

ii) Edit the /etc/pam.d/login file and add following line:
session required pam_limits.so
iii) Edit the /etc/sysctl.conf and add following lines:
| fs.aio-max-nr = 1048576 fs.file-max = 6815744 kernel.shmmni = 4096 kernel.sem = 250 32000 100 128 net.ipv4.ip_local_port_range = 9000 65500 net.core.rmem_default = 262144 net.core.rmem_max = 4194304 net.core.wmem_default = 262144 net.core.wmem_max = 1048586 |

You need reboot system or execute "sysctl -p" command to apply above settings
Step 6
Step 6
i) Setting Grid User Enviroment
Edit the /home/grid/.bash_profile file and add following lines
TMP=/tmp; export TMP
TMPDIR=$TMP; export TMPDIR
ORACLE_HOSTNAME=ws1; export ORACLE_HOSTNAME
ORACLE_SID=+ASM; export ORACLE_SID
ORACLE_BASE=/opt/grid; export ORACLE_BASE
ORACLE_HOME=$ORACLE_BASE/product/Grid11gR2; export ORACLE_HOME
PATH=$ORACLE_HOME/bin:$PATH; export PATH
if [ $USER = "oracle" ] || [ $USER = "grid" ]; then
if [ $SHELL = "/bin/ksh" ]; then
ulimit -p 16384
ulimit -n 65536
else
ulimit -u 16384 -n 65536
fi
umask 022
fi

ii) Setting Oracle User Enviroment
Edit the /home/oracle/.bash_profile file and add following lines
TMP=/tmp; export TMP
TMPDIR=$TMP; export TMPDIR
ORACLE_HOSTNAME=ws1; export ORACLE_HOSTNAME
ORACLE_BASE=/opt/oracle; export ORACLE_BASE
ORACLE_HOME=$ORACLE_BASE/OraDB11gR2; export ORACLE_HOME
ORACLE_SID=ORCL; export ORACLE_SID
ORACLE_TERM=xterm; export ORACLE_TERM
PATH=/usr/sbin:$PATH; export PATH
PATH=$ORACLE_HOME/bin:$PATH; export PATH
LD_LIBRARY_PATH=$ORACLE_HOME/lib:/lib:/usr/lib; export LD_LIBRARY_PATH
CLASSPATH=$ORACLE_HOME/JRE:$ORACLE_HOME/jlib:$ORACLE_HOME/rdbms/jlib; export CLASSPATH
if [ $USER = "oracle" ] || [ $USER = "grid" ]; then
if [ $SHELL = "/bin/ksh" ]; then
ulimit -p 16384
ulimit -n 65536
else
ulimit -u 16384 -n 65536
fi
umask 022
fi

Step 7
Some additional packages are required for successful instalation of Oracle Grid Infrastructure software. To check wheter required packages are installed on your operating system use following command:
# rpm -q binutils elfutils elfutils-libelf gcc gcc-c++ glibc glibc-common glibc-devel compat-libstdc++-33 cpp make compat-db sysstat libaio libaio-devel unixODBC unixODBC-devel|sort

Step 8
Install required ASMLib softwares
#rpm -ivh oracleasm-support-2.1.3-1.el5.i386.rpm /
oracleasmlib-2.0.4-1.el5.i386.rpm /
oracleasm-2.6.18-164.el5-2.0.5-1.el5.i686.rpm
Step 9
Check the available partitions
#ls -l /dev/sd*

Step 10
Both ASMLib and raw devices require the candidate disks to be partitioned before they can be accessed. The following picture shows the "/dev/sda" disk being partitioned.

The remaining disks ("/dev/sdb" and "/dev/sdc") must be partitioned in the same way.
Step 11
To label the disks for use by ASM, perform the following steps:
i) configure oracleasm by using the command
# oracleasm configure -i
and answer the prompts as shown in the screenshot.

ii) Initialize the asmlib with the oracleasm init command. This command loads the oracleasm module and mounts the oracleasm filesystem.

iii) Use the oracleasm createdisk
In my casethe disks names are DISK1, DISK2 and DISK3 as shown in the screenshot.

iv) Check that the disk are visible using the oracleasm listdisks command.

vii) Check the the disks are mounted in the oracleasm filesystem with the command
ls -l /dev/oracleasm/disks

Step 12
i) Extract Linux_11R2_grid software into /mnt directory
# unzip /mnt/Linux_11gR2_grid
Change the ownership and group of grid software directory
# chown grid /mnt/grid –R
# chgrp oinstall /mnt/grid –R
Step 13
i) Now login from grid user
ii) Start the installer with the command
./runInstaller
iii) On the first screen of the installer, select Install and Configure Grid Infrastructure for a Standalone Server. Click Next.

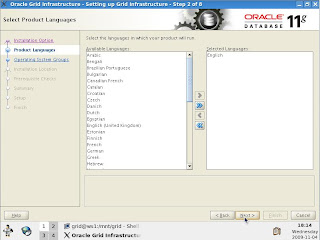
iv) On the Select Product Languages screen, select the Languages that should be supported in this installation.

v) On the CreateASMDiskGroup screen,
Set Redundancy to Normal
Select the disks: ORCL:DISK1, ORCL:DISK2, and ORCL:DISK3.
Click Next

vi) Specify ASM Password

vii) Privileged Operating System Groups

viii) Specify Installation Location

ix) Perform Prerequisite Checks

x) Summary

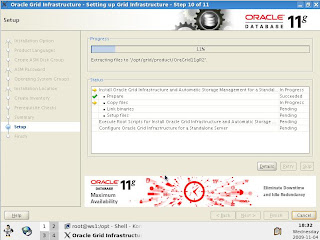
xi) The setup page shows the install progress

xii) The Execute Configuration Scripts page asks you to execute a configuration script as the root user.

xiii) Successfully Install


The Result of the execution of root.sh script
[root@ws1 OraGrid11gR2]# ./root.sh
Running Oracle 11g root.sh script...
The following environment variables are set as:
ORACLE_OWNER= grid
ORACLE_HOME= /opt/grid/product/OraGrid11gR2
Enter the full pathname of the local bin directory: [/usr/local/bin]:
Copying dbhome to /usr/local/bin ...
Copying oraenv to /usr/local/bin ...
Copying coraenv to /usr/local/bin ...
Creating /etc/oratab file...
Entries will be added to the /etc/oratab file as needed by
Database Configuration Assistant when a database is created
Finished running generic part of root.sh script.
Now product-specific root actions will be performed.
2009-11-04 19:08:14: Checking for super user privileges
2009-11-04 19:08:14: User has super user privileges
2009-11-04 19:08:14: Parsing the host name
Using configuration parameter file: /opt/grid/product/OraGrid11gR2/crs/install/crsconfig_params
Creating trace directory
LOCAL ADD MODE
Creating OCR keys for user 'grid', privgrp 'oinstall'..
Operation successful.
CRS-4664: Node ws1 successfully pinned.
Adding daemon to inittab
CRS-4123: Oracle High Availability Services has been started.
ohasd is starting
ws1 2009/11/04 19:11:01 /opt/grid/product/OraGrid11gR2/cdata/ws1/backup_20091104_191101.olr
Successfully configured Oracle Grid Infrastructure for a Standalone Server
Updating inventory properties for clusterware
Starting Oracle Universal Installer...
Checking swap space: must be greater than 500 MB. Actual 2000 MB Passed
The inventory pointer is located at /etc/oraInst.loc
The inventory is located at /opt/grid/oraInventory
'UpdateNodeList' was successful.
ASM can be used asmca Management


Comments
Post a Comment