Create and Configure a Data Source in Weblogic Server for WebCenter Sites
In this post we will craete and configure a Data Source in Weblogic Server for Oracle WebCenter installation. I assumes that the admin server has already start.
Create the Data Source
Log in to the WebLogic Server Administration Console.
1) In the tree at the left expand Services.
2) Click Data Sources.
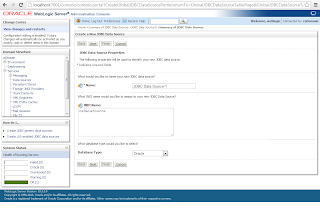
3) Click New and select Generic Data Source
4. In the “Create a New JDBC Data Source” screen, enter the following values:
a. A name for the data source.
b. csDataSource for the JNDI name.
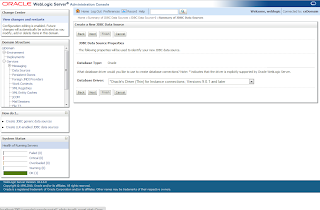
5) Select database type/driver pair as Oracle / Oracle’s Driver (Thin) for Instance connections; versions: 9.0.1 and higher
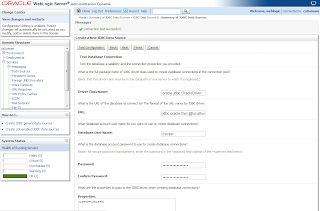
6) In Connection Properties enter the database name, host name for the database server, port, user name, and password. Click Next.
7) Verify that the data source information is correct, and click Test Configuration. This will test your data source. If the test fails, review your data source information, and try again. When the test succeeds, click Next.
8) Select the server that applies to your installation and then click Finish.
9) Click Activate Changes.
Configure the Connection Pool Size
The default values allow a connection pool to contain only up to 15 physical connections and this value needs to be increased.
1) In the left-hand tree:
2) Expand Services.
3) Click Data Sources.
4) Click on the newly created data source.
5) In the Configuration tab click Connection Pool.
6) For “Initial Capacity,” enter 10 and for “Maximum Capacity,” enter 100.
Click Save.




Hello Shaheer,
ReplyDeleteThanks for wonderful post. I am installing sites 11.1.1.8 on weblogic and windows 7 platform with oracle XE 11g REL 2 DB.
During install at 78 % it shows me error "insert to prepared statement failed for Japanese characters being too long.
my guess is, if weblogic and database is configured to UTF-8 then this error would go away. Is my assumption correct ? in that case, how do i configure current DB and server to UTF - 8 and then hoping i can proceed beyond 78 % to completion... Thx.