Oracle WebCenter Sites 11g Installation on Windows 7 with Weblogic Server
After completing prerequsities steps for WebCenter Sites installation on windows 7, we are in the position to start the install of WebCenter Sites using the provided installer.
Extract the WebCenter Sites installer archive into a directory. Go to the following path and run csInstall.bat file
<directory>\sites\WebCenterSites\WCS_Sites_11.1.1.6.0\ContentServer
run csInstall.bat file
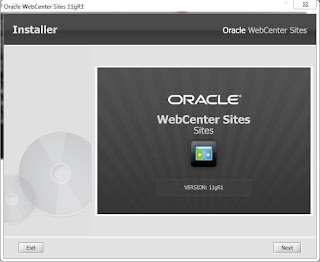
WebCenter Sites installer screen will appear from that click next.
On pre-installation requirements screen click next to continue.

Set path to the sites installation directory

Select Development or Content Management System from the site system type.

From the Installation mode select Custom

Specify whether this installation is clustered or non-clustered. I am selecting Singler Server

Set ContentServer password

Set fwadmin password

Set Satellite Server Password

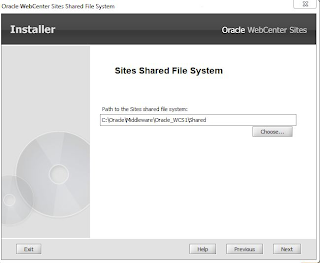
Set path to the Sites Shared file system
Specify Host name or IP address of your application server and port number of your application server.

Select the application server you are using.

Specify path to the Weblogic application server directory and leave the application context root (URI) as /servlet

Specify the Weblogic domain name, leave the site application name as CS and specify the path to the manual deployment directory.

From enter CAS deployment information leave default setting.

From the summary screen click next to continue the installation.

Halfway through the installation, the installer displays the “Installation Actions”
window, which lists the steps you must perform to complete the installation.

a) Deploy the WebCenter Sites and CAS applications
Do the following
1) Log in to the Admin interface.
2) In the “Domain Structure” panel, click Deployments.
3) Click the Install button
4) Select cs (open directory), then click Next

5) Select the Install this deployment as an application option, then click Next.

6) In the “Source accessibility” section, select I will make the deployment accessible from the following location.
 7) Click Next and then Finish
8) Similar to deploy the CAS application
After the deployment of both CS and CAS both Health status must be OK

b. Before continuing with the installation process
Do the following
1) To ensure that Ehcache functions properly, edit the cas-cache.xml, cscache. xml, ss-cache.xml, and linked-cache.xml files (located in the WebCenter Sites deployed directory in the WEB-INF/classes folder). The following fields must be unique for each cache type:
- multicastGroupAddress
- multicastGroupPort
- timeToLive
After completing above steps, click Test and the following status must be successfull.
1) HelloCS success
2) Ping DB success
3) DB Permission success
Click Ok to continue the installation

That's it. The installation of Oracle WebCenter Sites is completed successfully.
Extract the WebCenter Sites installer archive into a directory. Go to the following path and run csInstall.bat file
<directory>\sites\WebCenterSites\WCS_Sites_11.1.1.6.0\ContentServer
run csInstall.bat file
WebCenter Sites installer screen will appear from that click next.

On pre-installation requirements screen click next to continue.

Set path to the sites installation directory

Select Development or Content Management System from the site system type.

From the Installation mode select Custom

Specify whether this installation is clustered or non-clustered. I am selecting Singler Server

Set ContentServer password

Set fwadmin password

Set Satellite Server Password

Set path to the Sites Shared file system

Specify Host name or IP address of your application server and port number of your application server.

Select the application server you are using.

Specify path to the Weblogic application server directory and leave the application context root (URI) as /servlet

Specify the Weblogic domain name, leave the site application name as CS and specify the path to the manual deployment directory.

From enter CAS deployment information leave default setting.

From the summary screen click next to continue the installation.

Halfway through the installation, the installer displays the “Installation Actions”
window, which lists the steps you must perform to complete the installation.

Do the following
1) Log in to the Admin interface.
2) In the “Domain Structure” panel, click Deployments.
3) Click the Install button
4) Select cs (open directory), then click Next

5) Select the Install this deployment as an application option, then click Next.

6) In the “Source accessibility” section, select I will make the deployment accessible from the following location.

8) Similar to deploy the CAS application
After the deployment of both CS and CAS both Health status must be OK

b. Before continuing with the installation process
Do the following
1) To ensure that Ehcache functions properly, edit the cas-cache.xml, cscache. xml, ss-cache.xml, and linked-cache.xml files (located in the WebCenter Sites deployed directory in the WEB-INF/classes folder). The following fields must be unique for each cache type:
- multicastGroupAddress
- multicastGroupPort
- timeToLive
After completing above steps, click Test and the following status must be successfull.
1) HelloCS success
2) Ping DB success
3) DB Permission success
Click Ok to continue the installation

That's it. The installation of Oracle WebCenter Sites is completed successfully.


Comments
Post a Comment