Posts

Showing posts with the label GlassFish

How to take Backup and Restore a Domain of Oracle GlassFish Application Server
Image
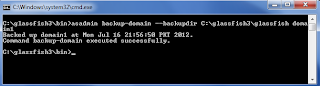
Backup Domain backup-domain  subcommand is used to take backup of domain. Before start the backup process, ensure that domain is stopped and then execute the following command. The  backup-domain  command operates only when the domain is stopped or suspended. # asadmin backup-domain --backupdir [directory patch] domainname --backupdir  switch is used to specify a directory in which to store the backup.

How to Deploy and Undeploy an Application in Oracle GlassFish Application Server

The easiest way of deploying an application through the command line is by using the following command: # asadmin deploy [ path of file ]/webapp1.war Access the webapp1  application by typing the following URL in your browser:

How to Delete Domain in Oracle GlassFish Application Server

Image
Deleting a domain is very simple in Oracle GlassFish Application Server. It can be accomplished by issuing the following command in the command line: # asadmin delete-domain domainname

How to Configure Multiple Domains in Oracle GlassFish Application Server

Image
If we want several domains to execute concurrently on the same server, then ports must be chosen carefully, as specifying the same ports for different services or even the same service across domains will prevent one of the domains form working properly. So to avoid port conflict you have to assign different port numbers in different domains for each purpose. The easy way of doing  this is using portbase option in create-domain command. Given below is the create domain command with portbase option. # asadmin create-domain --portbase [port number] domainname

List of Services for the domain in Oracle GlassFish Application Server

The default posts for the default domain are listed in the following table: Services Port Admin 4848 HTTP 8080 Java Messaging System (JMS) 7676       Internet Inter-ORB Protocal (IIOP) 3700 Secure HTTP (HTTPS) 8181 Secure IIOP 3820 Mutual Authorization IIOP 3920 Java Management Extensions (JMX) Administration 8686

How to Stop Oracle GlassFish Application Server Domain

Image
A domain that is executing can be stopped by issuing the following command: # asadmin stop-domain domainname

How to Start Oracle GlassFish Application Server Domain

Image
To start GlassFish, change the directory to [glassfish installation directory]/glassfishv3/bin on command prompt and execute the following command: # asadmin start-domain domainname I have configured domain1 as domain name and in my case above command change to:

How to create domains in Oracle GlassFish Application Server

Image
To create domain in GlassFish Server, open command prompt and change the directory to [glassfish installation directory]/glassfishv3/bin and execute the following command. The asadmin batch file is located in BIN folder that's way we change the directory location in command prompt. # asadmin create-domain domainname Change the domainname on your choice. Here I am creating a new domain called domain1 as shown below:

Call Oracle Stored Function using CallableStatement through Oracle JDBC Pool Recource

The Oracle PL/SQL language allows you to write functions and procedure to centralize the business logic and store the code in the database. This business logic may be call in many different ways including from a Glassfish Server's JDBC Pool Connection Resource. There are five steps involved in calling a PL/SQL Function from within a application: Create and prepare a JDBC CallableStatement object that contains a call to your PL/SQL function. Register the output parameter for your PL/SQL function. Provide all of the required parameter values to your PL/SQL function. Call the execute() method for your CallableStatement object, which then performs the call to your PL/SQL procedure. Read the returned value from your PL/SQL function.

How to use JDBC Connection Pool Resource in Java Application

Image
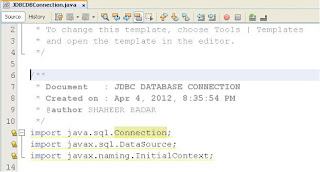
In the previous post we created a JDBC Pool Resource and now in this post i will show you that how to use JDBC connection pool resource your Java Application. 1) Import following Classes in your application. import java.sql.Connection; import javax.sql.DataSource; import javax.naming.InitialContext; 2) Create a JDBCconnection Class as mentioned public class JDBCconnection(){ private DataSource ODS; private Connection CN; public JDBCconnection(){ try { InitialContext ctx = new InitialContext(); /*jdbc/__oracon is a pooled resource name*/ ODS = (javax.sql.DataSource) ctx.lookup("jdbc/__oracon"); CN = ODS.getConnection(); if (CN== null){ System.out.println("Error occur while establishing connection"); } } catch (Exception e){ System.out.println("Oops! " + e.getMessage()); } } } Now using the Connection CN you can call both PreparedStatement Or CallableStatement to write SQL statement directly in your code or call Stored Function, Procedures etc.

How to create a JDBC Resource using JDBC Connection Pool

Image
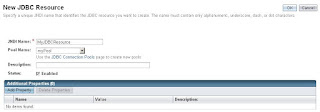
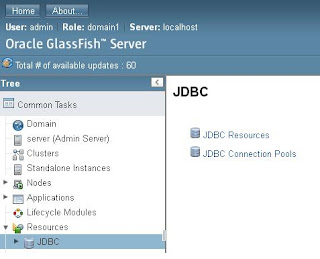
In the previous post I have created an Oracle JDBC Connection Pool using Glassfish 3.1 and in this post I will show you how to add JDBC Connection Pool into JDBC Resource. 1) On the left pane, click on Resources → JDBC → JDBC Resources 2) Click on the “New” button to add a new JDBC resource. In the resulting form, type in MyJDBCResource for JNDI Name. For the Pool Name, select myPool. Leave the rest as default and click OK. 3) You should see that your resource has created. Now your JDBC Resource is ready to use into your web application.

Create Oracle Database Pool in GlassFish 3.1

Image
To create an Oracle Datasource Pool in Glassfish, follow these steps 1. Copy the Oracle JDBC drivers (i.e. ojdbc6 in my case) to \glassfish\glassfish\domains\domain1\lib\ext directory. domain1 name may be changed according to your setting. 2. Start Glassfish. 3. Login to the admin interface and create a JDBC Connection Pool. 4) Enter the Pool name, Resource Type and Database Driver Vendor. Click next to proceed 5) In General Setting check the ping enabled property. 6) Instead of following mention properties, delete all the others properties. user - set this to Oracle userid password - set this to Oracle password URL - set this to the URL, example jdbc:oracle:thin:@localhost:1521:SID 7) After doing all setting click on finish and ping succeeded message will appear on the top of the page. Finally add your Pool into JDBC Resources and after that your DataSource is ready to use.

Installation of Oracle GlassFish Server 3.1

Image
Oracle GlassFish Server is the worlds first implementation of the Java Platform, Enterprise Edition (Java EE) 6 specification. Built using the GlassFish Server Open Source Edition, Oracle GlassFish Server delivers a flexible, lightweight and production ready Java EE 6 platform. In this post i will show you to how install Oracle GlassFish Sever 3.1 1) Run the ogs-3.1-windows setup file 2) After read the introduction, Choose the installation type 3) Select the installation directory 4) The option Update Tool periodically checks GlassFish Server updates 5) After ready to install, installation in progress 6) After installation configuration will start. Configuration like Domain Creation, Configure Admin, HTTP, JMS etc ports. Finally the GlassFish Server is installed and ready to use.